

Rototillers | Buying tips, maintenance and operation
Tags : attachments | rototillers | woods | woods-landing |Neil from Messick's here, out to talk to you today about rototillers and everything you probably ever wanted to know, and then some. We're going to talk through four different things here with you today. We're going to talk through the features of a rototiller if you happen to be shopping for one. The operation of one, if you're actually outputting it into the dirt. The process that you need to go through in order to attach it onto your tractor, and some maintenance tips if you own one today.
We'll start going through features of a rototiller. Generally, when you're sizing a rototiller to a tractor, you're going to be looking for one that covers the rear wheels of a machine. I've got this here pin on the back of an MX Series tractor. I picked this tractor because it's one that we operate in rental fleet, so I can get it dirty, and this tiller is also our rental fleet tiller, and it oddly happens to be a little bit small for this tractor. This is a Woods TS60, a 60-inch model. This MX tractor, if you pulled a tape measure across the back, you're going to find it's right about 68 inches across the rear wheels, but you can actually get away with that. A lot of these tillers you're going to find can offset.
In the case of the Woods right here, you'll notice the points here that the three-point arms attach onto the tiller can be loosened and side-shifted left to right. Side-shift is a feature that you won't find on all rototillers, so if you think you might be taking your attachment and shuffling it between tractors, that side-shift can enable you to be able to go up or down through different models and still be able to cover the tire track at the back of the tractor.
You want to be able to do that because as you're going back and forth running your tiller, you don't want to be driving over top of the soil that you just tilled. It ruins the seedbed that you're trying to make as you're running it. You want to look for that feature, that side-shift, if you're going to be doing that.
Tillers are driven by the end. Generally, you're going to have a shaft coming back and a gearbox. That gearbox is going to turn the power 90 degrees. It's going to go out to the end of the tiller, and then the power is going to drop down to go down to the tilling mechanism on the bottom. You're going to find two different styles of dropping power down on that tiller. It's either going to be a chain drive and an oil bath down here on the end, or gear-driven with generally four different gears down there in order to transfer that power down.
Had a funny conversation with a tiller manufacturer about that actually. Gear-drive tillers are generally a little bit more expensive than their chain drive counterparts. The tiller manufacturers will tell you that's money that's not worth spending. By and large, they were happier with the older chain drive systems than they have been with the gear-driven ones. By and large the reason why gear-driven tillers are being offered by most companies today is the perception that you and I would often have of gear-driven systems being better than chain driven.
Advice for the tiller guys, don't spend the extra money for the gear drive tillers, the chains are just fine. Haven't seen problems from the gear drives either, so if you've got one today, you've not made some kind of huge mistake, nothing to run away from there.
Tillers are sold in two different variants, either forward-rotating tines or reverse-rotating tines. This version here is forward-rotating. Those two different systems are going to till the ground very differently, so by and large, you're going to find most tillers are the forward-rotating variety. The forward rotation, because of the way that they spin, if they hit rocks or those kinds of things, they catch debris in the field, they're going to bounce up on top of those things. It's going to take that big rock, push it down into the ground, and right up on top of it.
The backward-rotating version is going to take any debris that it finds and pull it up into the shield, into the tiller itself. If you happen to catch a log or something that you didn't see out there, a tree limb, or a big rock, it's going to pull it up into the machine and bend up the inside of the tiller. Why would you buy a reverse-rotation tiller? Because the tines are running backwards, the tiller is pulling in the opposite direction of the tractor and it's also pulling itself down into the ground. If you're trying to go into say, virgin soil, it's going to be more aggressive and it's going to get down into the ground a little bit better.
It's also going to take that soil and throw the soil up on top and give you a little bit nicer finish at the end than what a forward-rotation tiller does, just because of the direction that the tines are spinning. Reverse-rotation, if you know where you are and you're working in established areas, is going to give you a little bit nicer finish coming out the back, but by and large, you're going to find the forward rotation variety being a lot more popular and run a lot more, because we just don't have the damage concerns that we do with reverse.
Received a lot of questions from guys often unsure of how to do their three-point hitch adjustments for various implements. A rototiller is one of those things that I like to have tight but not too tight, if that's a way to describe it. You want a little bit of side-to-side play in a rototiller, and that's because if you have this thing dropped down into the ground and you go to turn your tractor, you don't want to bind it up while it's down there.
A little bit of side to side wiggle, what we've got right here would be desirable, but you certainly don't want to have so much that the thing's going to slop around behind the tractor. That can get annoying, too. As far as your top link goes, you're going to want to rotate this guy until the skid shoes on the bottom of the tiller are more or less level with the ground. Not necessarily to get out your bubble level in order to do this one, you can eyeball it just fine, but generally, there's some skid shoes down there that are going to be used to adjust your height. You want to set those shoes more or less flat.
Talked earlier about this side-shift being a feature here. I've got the side-shift set up here for about two inches on the back of my MX just to get this thing a little bit closer to the outside tires because my tiller is not covering the footprint of my tractor so you want to eyeball that up, too.
If you're getting your tiller out for the very first time in the course of the year, there's a couple of things that you should walk around and put eyes on, just from a general maintenance and ownership perspective. You're going to have two oil baths in here, the central gearbox, and the gear case down here in the end, whether you've got gears or a chain, you're going to have oil down here in the end. Both of these things are fairly low tech. They're going to have a check plug and a fill plug and you're just going to basically open that up and make sure that you've got the thing good and full of oil.
These kind of gearboxes aren't going to be super picky about the kinds of oils that you put in there, so as long as you've got some decent gear oil, you're going to be just fine. Tillers are going to have a slip clutch on them in order to allow those tines to slip. If you do come into some kind of obstruction, you can eyeball the slip clutch down here inside the shield. A good idea annually is to take this slip clutch and force it to slip, because if these things are left to rust up, they'll bind and then you have no protection back to your tractor's drive line at all.
Especially if you keep your attachments outside, you're going to want to run through some slip clutch adjustments. I've got separate videos here that will talk you through on exactly how to do that, but you want to put eyes in that slip clutch annually. Right and about, the grease gun is always going to be ideal, a good idea. You're going to find a bunch of Zerks on your PTO shaft, and if you have U-joints, depending on what the shafting looks like, going back to your gearbox, out to the end of the tiller, you want to put eyes on that. Some models will have those in the U-joints, but not all will.
If you've got any kind of twine, or plastic, or stringy debris, your tiller is going to find it and it will end up wrapped back here in around the tines. It's a good idea to get down here and put eyes on these things and pull any of that kind of stuff out as soon as it accumulates down here, especially if it's pushed up against the bearings at the end. That kind of stuff putting pressure and pushing back into the bearings is what causes seals and stuff to pop out. Always make sure if you caught anything in here, you do your best to get in here and get that cleaned out.
Also, on those big bearings on the end, you're generally going to find grease Zerks, so while you're hitting the top of the tiller with your grease gun, you want to look down here on the underside as well. You don't want to miss these.
We're going to go and till up two different areas here, just to give you a little idea of what this looks like. I'm going to go turn, basically grass here. If you were starting a garden for the very first time, we'll do a short strip over here and show you what you can expect from a forward rotation tiller. We also got a really compacted area over here that's frankly a road. We'll go and till that up a little bit and just see if we can get this guy to bite down on the ground and loosen it up a little bit. Come along with me. We'll see what it does.
You see here as I'm going, I'm getting a lot of grass. This is a bit of a yard. My depth setting on the tiller is to drop it down the entire way, but it doesn't look like I'm really quite that deep. When you're going into something like this for the first time, tilling it multiple times is pretty much necessary and each time you're going to get the soil a little bit looser, so those end plates are going to be able to drop further and further down into the ground.
This reverse pass is when it's nice to have and tiller that's going to cover your back tires. I said I'm running an offset on this, but even with an offset, I got to go in and circle all the way around to the other side if I really don't want to drive across where I've already been.
There, I caught a rock. If you're watching the tiller there, we caught a rock or something hard underground and the tiller bounced, It jumped up over top of that rock. That's the time where if you've got the reverse rotation pillar, which is going to be a little bit more aggressive, it's going to pull this up down into the ground, that rock wouldn't pop up into the hood. We do sell a fair amount of reverse rotation tillers. Like I said, you just want to be mindful that that's a piece that you're running in a ground that you're familiar with.
It maybe hard to see it, but from my vantage point now, I can see that my tiller's a little bit deeper than I was before. One thing you want to remember here when you get to the end of your rows is to lift before you turn. You have your tiller setting down into the ground and if it's embedded in there at all. When you make your turn, it's not going to track immediately behind you and you'll be trying to push it left or right. It's always a good idea to lift ground the gauging implements before you turn your tractor.
You can see here a couple passes back and forth at that tiller and I've got the soil to a point that it's more than adequate for coming in and starting a garden or something like that. I've got a couple of inches of nice loose topsoil. After a little while, this grass is going to start to die off and coming back through here in another week or so, probably wouldn't be a bad idea if you're really actually going to start something as a garden, but just a pass or two out here does the job. You can see I did find some rocks and stuff in here. We talked about forward versus a reverse tine.
Starting ground like this for the first time, the reverse tine is going to be more aggressive and the dirt's coming over the top. It is going to finish a little bit better, but this stuff is where you're going to run into a problem. Just be mindful if you are looking at that reverse-tine tiller, they have their place in established gardens, but for what we're doing here today, that forward tine is going to be the way to go. Come along here with me. We'll go up and run this guy in a road up here a little bit too, and see what it does.
We have a wash out here when we run some equipment back and forth, and I honestly, this might be a bad idea. Usually you'd want to come through here with a ripper or a land plane, a box scraper, something else to loosen this thing up, but it's hard and it's compacted. I thought it'd be interesting to see what the tiller does. We're going to take it over here and lower it down a little bit and we're going to run the engine a little bit slower. It's going to bounce around a little bit. That's a little bit more rocky that I want it to be.
You can see there the need for the slip clutch though. As I was sitting here watching the PTO shaft go, you're looking at a plastic shield on the outside, but the slip clutch plates are back inside, and I visually could see the slip clutch there going as we were hitting. In rotary cutters you have the choice of slip clutch versus shear pin drive lines. In tillers though, you're pretty much always going to want slip clutches. I'm not even sure how many companies would even offer this to you in a shear pin. I hope there's none, but given the type of work that these things do, you're going to want that slip clutch in there because it's got to be banging up in all kinds of stuff that you're going to find in the dirt.
Just be mindful of that, especially from the maintenance perspective, because we do see a lot of these slip clutches that ended up freezing up because they get rusted in place. Running through those maintenance procedures on the slip clutches and you're pushing your tillers like this, certainly is a good idea.
That's a little bit on rototillers, their use, operation, maintenance and features. If you're going through the buying process on a piece of equipment like this and you're considering a rototiller, it's definitely one that you want to consider picking up. For us, it is probably our second most popular implement after a front loader and that's because so many of our customers do their own gardens and those kinds of things around their property.
It is also a piece that we rent. You notice I told you here, this is our rental tractor and tiller that I'm running here today. Renting these things is a nice thing because it is something that a lot of guys are only going to use once a year. It is an option if you're local to us to be able to do that kind of thing as opposed to owning one of these and having it on your property year-round for the occasional use you might have with it. If you're in the market for any attachments or if you have parts or service needs for equipment you've already got, give us a call at Messick's. We're available at 800-222-3373 or online at messicks.com.
More Articles
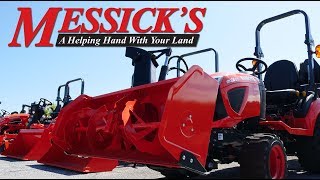
Kubota BX-80 Series with BX2816 Front Snowblower
We're out today with the Kubota BX2816 50 inch front snowblower for the BX80 series tractors. This is a unique piece that we have out here today typically we get a little frustrated when our vendors don't give us a whole lot of good information about front attachments and those kinds of things. We're going to spend some time on this one and hopefully be able to give you a little bit of information it might be hard to come by when flipping through a piece of literature.
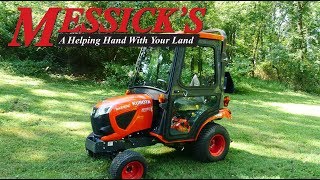
Kubota BX4070 Cab For the BX80-Series Tractors
We've got out today a cab one of Kubota BX-series tractor. This is Kubota 's new factory cab offering for this machine. One of the things we always find frustrating about a lot of our tractor manufacturers is that they never do a very good job of giving us a lot of information about the accessories for these machines. While we're out here today we've got one of these in a lot, we're going to take an opportunity to walk around here show you the way that this thing fits onto the machine and show you some of its features and benefits.
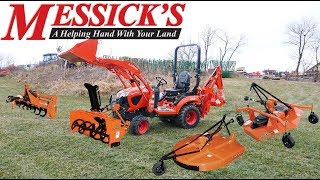
5 Most Common Compact Tractor Attachments
I'm here today do a quick explanation for you today of the top five implements that are typically sold with the compact tractor. Tractors themselves are after all tool carriers and most or every tractor is sold with at least two or more implements. We're going to show you some of the most common ones that are typically sold with new machines.