
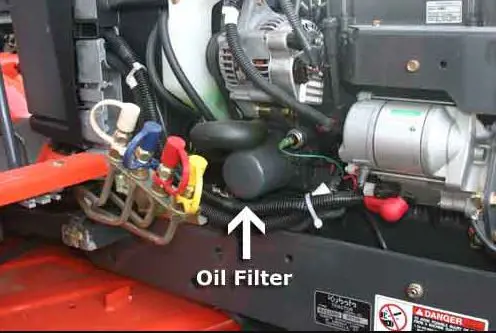
Kubota L-40 Series Service
Kubota L-40 Series Service
Pictures are of an L3940, concepts apply to other simular models.
L3240,L3540,L3940,L4240,L4740,L5240,L5740
Before performing any of the following operations, be sure that engine is stopped and has been given adequate time to cool down
|

|


|

|


|


|

|

|

|
|
|
More Articles
Kubota BX Loader Backhoe Challenge